 |
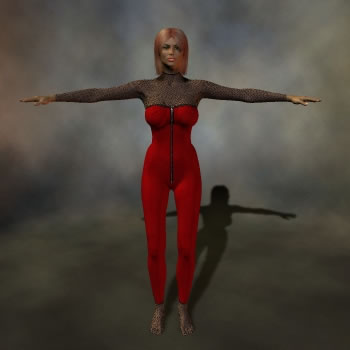
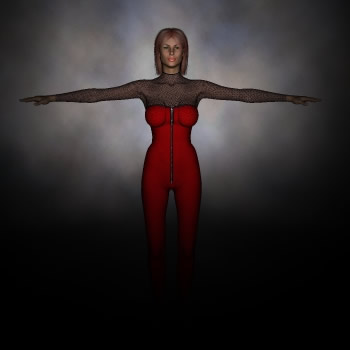
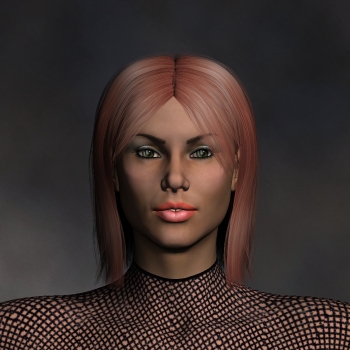
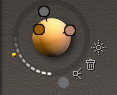
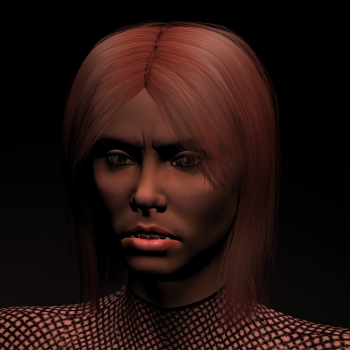
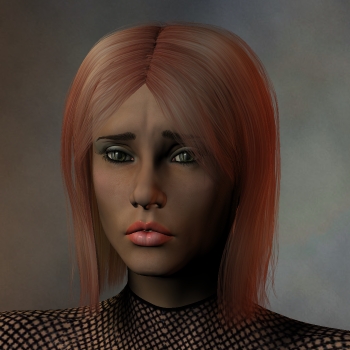
So we are going to be using this female model for this part of the
tutorial. She is the seen here with the default poser lighting.
This is the lighting I had here. All three are "INFINITE"
lights. Only light 2 had a shadow.
|
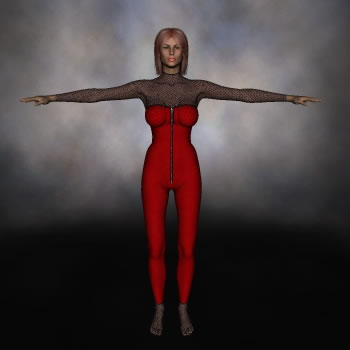 |
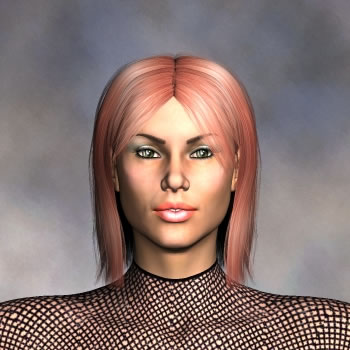
Here is a shot with a Infinite white light pointing straight at the
model. I turned off the shadows.
|
 |
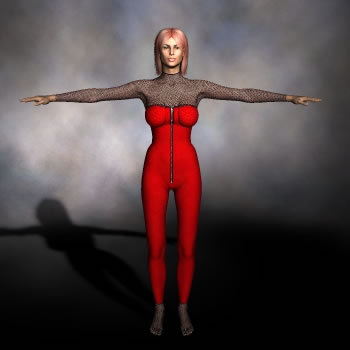
This is the same light I made as a spotlight. No shadow and these settings
Light 1 0 Angle Start Spline 0.0000
Light 1 0 Angle End Spline 70.0000
Light 1 0 depthMapSize Spline 256.0000
Light 1 0 xrot Spline 0.0000
Light 1 0 yrot Spline 0.0000
Light 1 0 zrot Spline -0.1485
Light 1 0 scale Spline 1.0000
Light 1 0 RED Spline 0.9805
Light 1 0 GREEN Spline 0.9805
Light 1 0 BLUE Spline 0.9805
Light 1 0 INTENSITY Spline 1.0000
Light 1 0 xtran Spline 0.0000
Light 1 0 ytran Spline 0.6050
Light 1 0 ztran Spline 1.0000 |
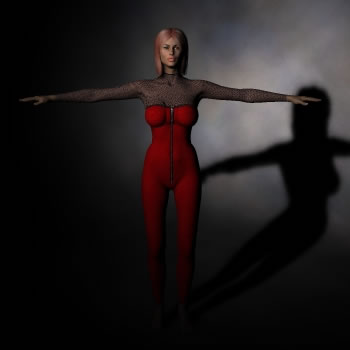 |
On this image. I turned the shadow back on and moved the light to her
right, using the Xtran dial. The shadow gives the room some depth. What
I usually do is, have one or two of the main lights have the shadow, and
then the filler lights, I turn off shadows. Turning off shadows will also
speed rendering. Here are my dials on this one.
Light 1 0 Angle Start Spline 0.0000
Light 1 0 Angle End Spline 70.0000
Light 1 0 Point At Spline 1.0000
Light 1 0 shadowStrength Spline 1.0000
Light 1 0 depthMapSize Spline 256.0000
Light 1 0 xrot Spline -42.0000
Light 1 0 yrot Spline -96.4812
Light 1 0 zrot Spline 0.0000
Light 1 0 scale Spline 1.0000
Light 1 0 KdRed Spline 0.9844
Light 1 0 KdGreen Spline 0.9844
Light 1 0 KdBlue Spline 0.9844
Light 1 0 KdIntensity Spline 1.0000
Light 1 0 xtran Spline -0.6637
Light 1 0 ytran Spline 0.9015
Light 1 0 ztran Spline 1.0306
|
| TOPIC
1 - OVEREXPOSURE! |
 |
This is a perfect example of what NOT to do. I see this everywhere too.
I wanted to better backlight the scene, so I added a white ambient light
and pointed it forward. I now have 2 full lights pointing on the character..
that is 200% Light! OVEREXPOSURE!! That is bad. |
 |
This is a close-up of the overexposed face. See the loss of detail? See
the shine on the face? |
 |
What I do here is drop the ambient light to 30% and the spot to 70%.
Now we have a total of 100% light and we re-render.
In contrast to the last one, this appears darker, but if you hide the
first picture, look away for a few minutes (go pee, and get another Mountain
Dew) and then look at this picture first, you will see what I mean.
This way, you retained the detail of the skin, kept the proper depth
shadows, and the skin doesn't look so shiny. |
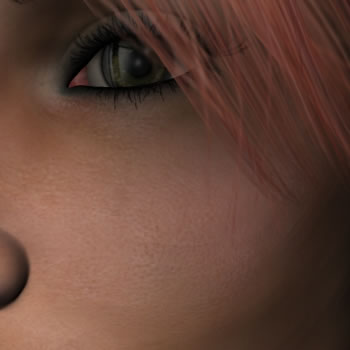 |
As you can see by this close-up the detail is retained.
You can add as many lights as you like, but it's important that the main
subject doesn't get over lit. If you wanted to throw a spot on a second
figure, and the light beam doesn't cross the first figure, then by all
means, make that light as bright as you need to. In other words.. you
can have 10 lights in a scene that have 100% just as long as no surface
is lit by 2 lights or the sum of the light be greater then 120% or so.. |
TOPIC
2 - AMBIANCE! |
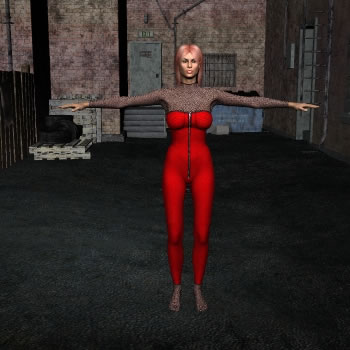 |
Let's take a scene. Now when I first started Poser, I wanted to light
things up. In Nov 2003, This would have been the way I made this scene.
2 Ambient lights(gray) and a spot pointing to the character from x=.5
- y=1.5 and z=1.0
|
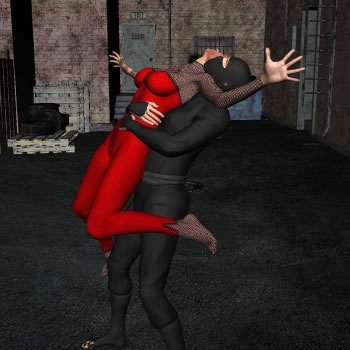 |
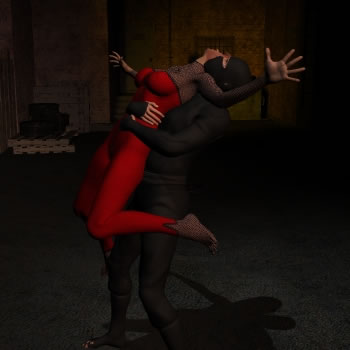
Let's put her into a fight with a Ninja. Looks pretty good, and I would
have done it this way my first year using poser... but I'd like to show
you something else.
Now.. my usually disclaimer is.. I can't dictate taste. Opinions will
vary, and your taste might lean towards something different. I cannot
control your taste, but since this is my tutorial. this is how I like
it, and how I do it. Others do it differently, most are better then me,
but again.. my tutorial. |
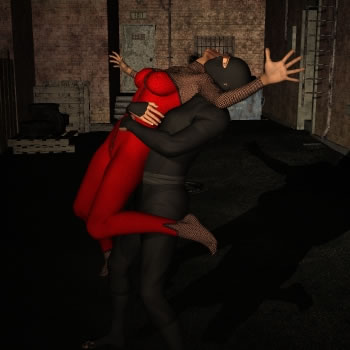 |
Now, on this image, I wanted to make it a bit more sinister, so I changed
the color of the lights to a brownish color and dropped one of the ambient
lights. With 2 spots, I created this more "night time" scene.
Light 1 was:
Light 1 0 Angle Start Spline 0.0000
Light 1 0 Angle End Spline 70.0000
Light 1 0 Point At Spline 1.0000
Light 1 0 shadowStrength Spline 1.0000
Light 1 0 depthMapSize Spline 2000.0000
Light 1 0 xrot Spline -56.0000
Light 1 0 yrot Spline 0.0000
Light 1 0 zrot Spline 0.0000
Light 1 0 scale Spline 1.0000
Light 1 0 KdRed Spline 1.0000
Light 1 0 KdGreen Spline 0.8427
Light 1 0 KdBlue Spline 0.6371
Light 1 0 KdIntensity Spline 0.9119
Light 1 0 xtran Spline -0.5000
Light 1 0 ytran Spline 1.0000
Light 1 0 ztran Spline 1.0000
Light 2 (no shadow) was:
Light 2 0 Angle Start Spline 0.0000
Light 2 0 Angle End Spline 70.0000
Light 2 0 shadowStrength Spline 0.0000
Light 2 0 depthMapSize Spline 256.0000
Light 2 0 xrot Spline 0.0000
Light 2 0 yrot Spline 0.0000
Light 2 0 zrot Spline 0.0000
Light 2 0 scale Spline 1.0000
Light 2 0 KdRed Spline 0.9686
Light 2 0 KdGreen Spline 0.8235
Light 2 0 KdBlue Spline 0.6667
Light 2 0 KdIntensity Spline 0.7000
Light 2 0 xtran Spline 0.1500
Light 2 0 ytran Spline 0.5370
Light 2 0 ztran Spline 2.0000
|
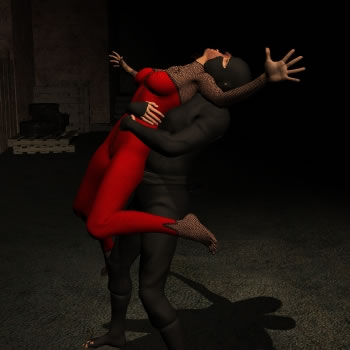 |
It still looked a little daytime-ish, most likely because of the shadow
at about a 5:00 PM angle. So...On this one, I increased the y on both
lights to have them hang basically overhead. Light 1 was set to point
at figure 1 face and light 2 was set to point at figure 2 face.
I did this to basically simulate street lights. However, we lose something
here. This one looks like someone standing above is holding a flashlight
down on them. The light REALLY looks empty and unnatural, and therefore
it draws attention to it's existence.
We need to make light seem natural, so the viewer doesn't notice the
lights themselves. I was once told by a woman, the best make-up job was
one where you couldn't see the make-up. This applies here too. |
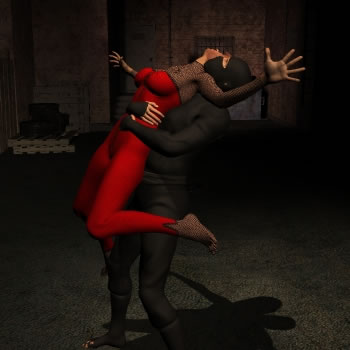 |
I created a light 3, colored it a reddish brown and from the x,y,z
of -.5,1.5,-1 - I pointed it at the dumpster. This lights up the walls
and adds depth to the scene. Since the "beam" of the light does
not cross either figure, it's intensity is irrelevant, but I didn't make
it too bright as to throw off the feel of the scene which was a dark alley
at night. I set it at 30%
Now the light looks more natural, and therefore doesn't look like an
"object" in the scene. The scene now also has some depth since
you can now see the distance to the horizon. |
 |
On this one, I changed the colors a little more to make the lights
look like they came from different sources. The light pointing at the
dumpster I made it a rusty color as if it came from a old alley light.
I then darkened the shade on lights 1 and 2 by adding a little amber
to them to match some street lights I've seen.
Since taste is something everyone differs on.. you might like the latter
one, but I like this one better. I would probably call this one finished.
|
TOPIC
3 - Using Light for Emotion! |
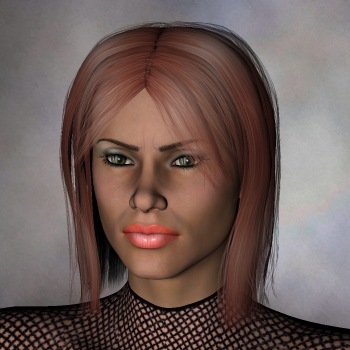 |
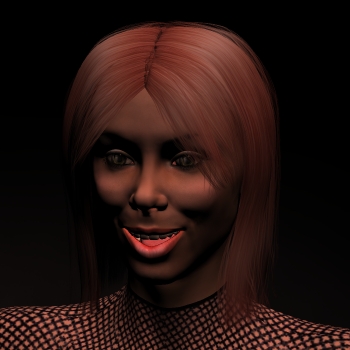
Returning to our face shot. I made our character look a little upset.
This light is the front infinite light set at 100 and pointing forward,
no shadow. |
 |
Now.. This is the spot, set at 100% and it's X,Y,Z, is .5,1,1 and the
shadow is on. This makes her look more serious, and secretive.
|
 |
For this one, I raised the Y axis so the light was overhead, an added
some red into it. I was after the darker shadows in this. Made her look
more dark and emotional. |
 |
It really doesn't work if she is happy though. Now it looks like she's
crazy, or having a breakdown of some sort. |
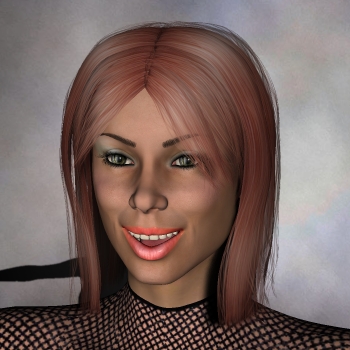 |
This is much better for happy. It's a bright image. It's a happy white
with a touch of powder blue. All is well!
I have one powder blue spotlight from the right side (her left) and a
white infinite light set at 30%
The total sum of the lights was 120% Probably the brightest I'd ever
go.
|
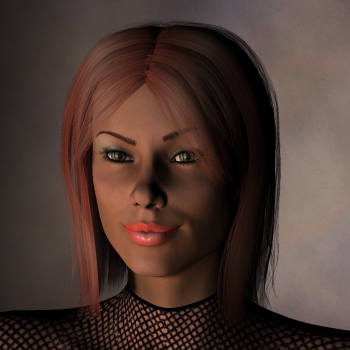 |
For a flirt, I would go back to a darker, romantic red feel and shadows
for that mysterious "I have a secret" look that women have when
they are crushing on someone.
|
 |
Something light and airy for the sad face. But I think you get the picture.
|
|
That's pretty much it for now. I think that really covers
all the basics for poser lighting. With this info, you can develop your
own style, and stop relying on the crappy lighting presets that people
come up with.
I hope you enjoy this tutorial.
Peace, and happy rendering.
Jpeger.
|
