|
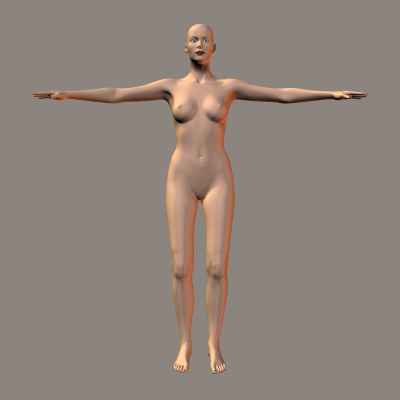 1.
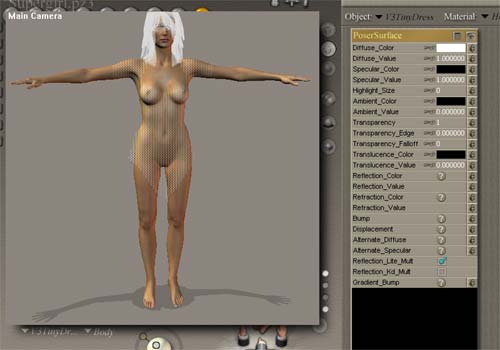
I will be using Daz 3d's Victoria. She is available free at http://www.daz3d.com.
I have remade V3 to pre load all the poses I like. All the features, and
all the dials. Just because that is my way. I find it a lot easier to
load my own "Blank" character then Daz's... again.. your call.
I just got tired of loading 100 dials every time i made a new character. 1.
I will be using Daz 3d's Victoria. She is available free at http://www.daz3d.com.
I have remade V3 to pre load all the poses I like. All the features, and
all the dials. Just because that is my way. I find it a lot easier to
load my own "Blank" character then Daz's... again.. your call.
I just got tired of loading 100 dials every time i made a new character.
|
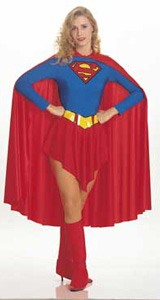 2.
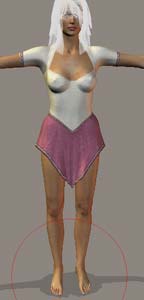
I'm choosing to go with the movie version of the Supergirl costume. The
skirt however will be normal. I don't like that front dip. I'd also like
the cape to be a little longer. 2.
I'm choosing to go with the movie version of the Supergirl costume. The
skirt however will be normal. I don't like that front dip. I'd also like
the cape to be a little longer. |
|
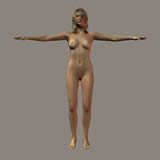 3. Time
to make the "person". I loaded Evolution Hair, and selected
the "!M-The Blonde" morph. Supergirl had long blonde hair, but
with her flying a lot, I wanted to go with something a little more wind
blown. 3. Time
to make the "person". I loaded Evolution Hair, and selected
the "!M-The Blonde" morph. Supergirl had long blonde hair, but
with her flying a lot, I wanted to go with something a little more wind
blown.
I then added the !V3Natural map. I'm holding off on any body modifications
until I see which clothing I'm going to modify. Nothing is more irritating
then loading the perfect body into a clothing figure that only allows
for 1 breast morph.
Again, just my opinion. Make her the way you want. |
|
Just so you know, I'm doing this at the same time that I am typing this,
so if I make mistakes, you'll see them live.
I went into my clothing area, and realized that the clothes I had wouldn't
work.
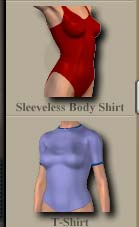  I
had originally thought I could get away with this easy, using the Morphing
Cocktail dress. Nope... The collar is too low. I
had originally thought I could get away with this easy, using the Morphing
Cocktail dress. Nope... The collar is too low.
The Morphing Fantasy Dress and the Starlet Dress Might work, but the
skirt is way too low.
The T-Shirt and body shirt either covered too much or too little. The
t-shirt had the full collar, but and the body shirt had no useable features.
|
|
 So
I tried the fantasy dress. There just seemed no way to get the hem up
to look like a skirt. So I have several options. So
I tried the fantasy dress. There just seemed no way to get the hem up
to look like a skirt. So I have several options.
I can make the skirt invisible, and find use the Morphing Cocktail Dress'
skirt. But when I unclick the "Visible" on the hip of the dress,
It looked choppy, and I don't want flesh gaps in my suit when I move her
later, so I'm dumping the Morphing Fantasy Dress.
|
|
 Then
I found the SS-Cheerleader outfit. Notice the Skirt. That looks strikingly
like the one above including the front dip I hate. Then
I found the SS-Cheerleader outfit. Notice the Skirt. That looks strikingly
like the one above including the front dip I hate.
The only set-back is that... the top is not what I'm looking for.. Hrm.
A dilemma. I'll have to custom make a shirt.
My best option now is to load the Catsuit and use that so I wont have
any gaps. Then I'll use the skirt from this figure to make her skirt.
Off to the Materials Room!
|
|
 So I head to the Materials Room and make the first item on this figure
invisible, then did "apply to all" so it's all clear. I'll go
back and make the skirt red later.
So I head to the Materials Room and make the first item on this figure
invisible, then did "apply to all" so it's all clear. I'll go
back and make the skirt red later.
Next, I load the Catsuit. Now I'm after the top. Remember, I needed the
full sleeves, so I can]t just go after the T-Shirt. Plus, with the Catsuit,
I can make the catsuit the same color of the costume under overlapping
things like the skirt, in case the character bending to the side opens
a gap. |
|
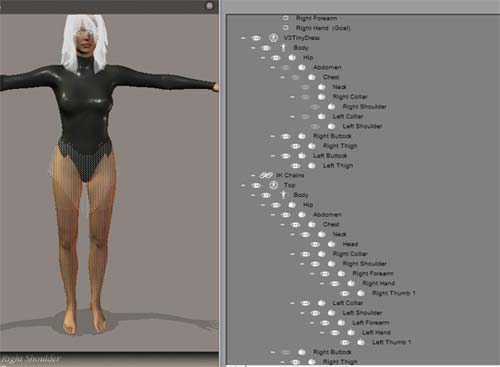 Now
I'm going to do a little parts cleanup in the Hiarchy Editor. I don't
need the V3 Cheerleader Costume right and left arms, chest, and whatever,
so I just turn them off. Not needed since it's invisible, but again..
this is just what *I* do. You can do it your own way. Now
I'm going to do a little parts cleanup in the Hiarchy Editor. I don't
need the V3 Cheerleader Costume right and left arms, chest, and whatever,
so I just turn them off. Not needed since it's invisible, but again..
this is just what *I* do. You can do it your own way.
*Note. An important lesson. SAVE! I just got the Left Forearm of Death!
Thank god I have a list of instructions above to rebuild... since I had
not saved. |
|
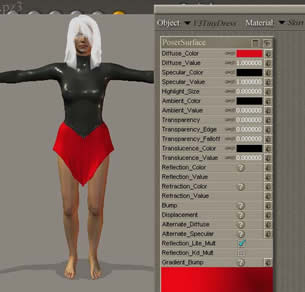 So
now in the materials room, I can make the skirt red. I might even later
go in and assign a cloth material to it. I'm not sure, but we are getting
closer! So
now in the materials room, I can make the skirt red. I might even later
go in and assign a cloth material to it. I'm not sure, but we are getting
closer!
Now for the hard part.. the top. |
|
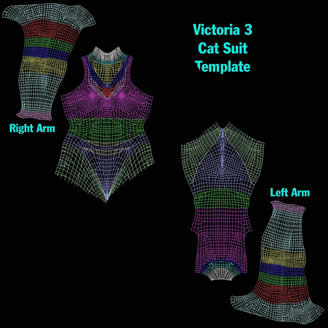
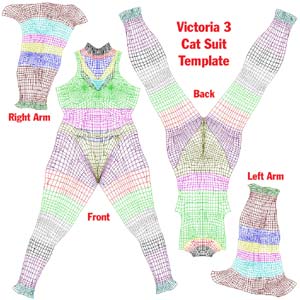 This
is the default Catsuit Template. It's available from Daz3d. You will see
the color codes designate the different "PARTS" of the catsuit.
Now It's time to play paint! This
is the default Catsuit Template. It's available from Daz3d. You will see
the color codes designate the different "PARTS" of the catsuit.
Now It's time to play paint!
|
|
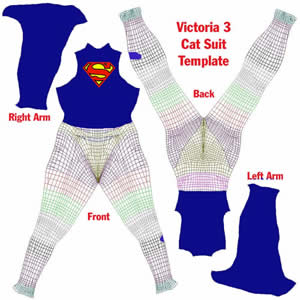 I painted the "relevant" parts of the suit Blue, and I found
a really nice logo, and placed it on the chest. I slipped a little on
the leg, but that is no big deal since we are not using that part anyway
I painted the "relevant" parts of the suit Blue, and I found
a really nice logo, and placed it on the chest. I slipped a little on
the leg, but that is no big deal since we are not using that part anyway
Let's load up the material and do a test render!
|
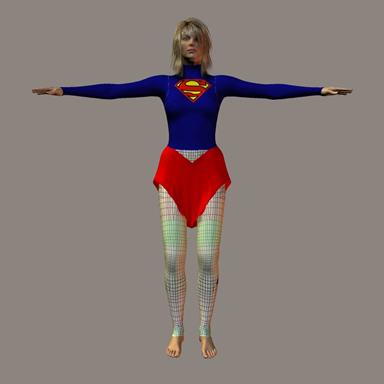 As
you can see, there is some things we need to clean up now. I'll go in and
do more blue on the stomach and see if I can't clean up the white lines
circling her arm pits. Then I will make the legs of the cat suit transparent,
or just simply turn them off. As
you can see, there is some things we need to clean up now. I'll go in and
do more blue on the stomach and see if I can't clean up the white lines
circling her arm pits. Then I will make the legs of the cat suit transparent,
or just simply turn them off. |
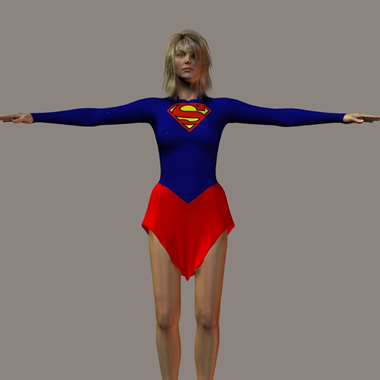 I
turned off the neck and I turned off the legs on the catsuit. Now all I
need is to make some boots, belt, and a cape! I
turned off the neck and I turned off the legs on the catsuit. Now all I
need is to make some boots, belt, and a cape! |
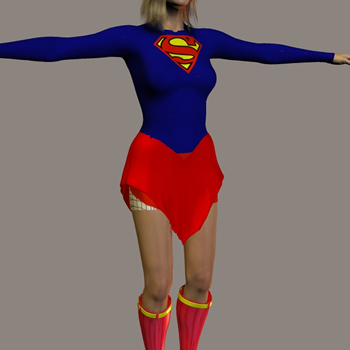
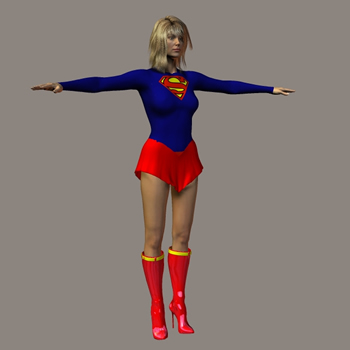
 I
added some boots. I had some boots from the second skin costume. I used
the materials room to change the boots to red. I'm not happy with the red
or the yellow on the boots. I will most likely change that before the final
to a deeper red and yellow. I
added some boots. I had some boots from the second skin costume. I used
the materials room to change the boots to red. I'm not happy with the red
or the yellow on the boots. I will most likely change that before the final
to a deeper red and yellow. |
|
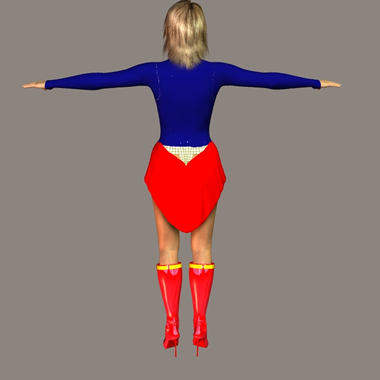 A quick peek at the back shows me I missed a little bit.
Now we have a problem.
I turned off the right and left buttocks and that is why it's peeking
through like that. I'm also not too sure I want the skirt hanging down
that low in the back. I'm going to have to put some red onto the Supergirl
Catsuit template.... time to experiment! |
|
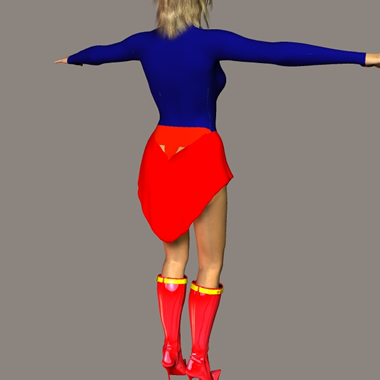 Even
though I filled in the template with red, we need to turn back on the
right and left buttocks. But this is going to mess with out thighs! This
is why the Gods of 3d invented Transparency Maps! Even
though I filled in the template with red, we need to turn back on the
right and left buttocks. But this is going to mess with out thighs! This
is why the Gods of 3d invented Transparency Maps!
|
|
 I
open the template into Photoshop, and i instantly inverse it to black
background. Since I'm only needing it for one thing, I'll only need to
load it for the right and left buttocks. I
open the template into Photoshop, and i instantly inverse it to black
background. Since I'm only needing it for one thing, I'll only need to
load it for the right and left buttocks.
Let me slow down. |
|
 Since I had to turn the buttocks back on, I will have "template"
stick out from the skirt. A transparency map will tell the rendering engine
to.. well.. leave the area in black transparent. This allows the leg to
stick back under the transparent buttock.
Since I had to turn the buttocks back on, I will have "template"
stick out from the skirt. A transparency map will tell the rendering engine
to.. well.. leave the area in black transparent. This allows the leg to
stick back under the transparent buttock.
Therefore, anything I want invisible, I just paint black (see above)
We only need those 2 little triangles over the ass to be visible anyway.
(see 2 images up), so the rest of the leg, I just paint back. |
|
 Outside
of a color matching problem that I can fix with diffuse... we got a skirt.
Only now... I think it' too low.. so I'm going to raise it. Outside
of a color matching problem that I can fix with diffuse... we got a skirt.
Only now... I think it' too low.. so I'm going to raise it.
|
|
 Again,
I have some things I need to clean up, but I think I'm ready for the next
step. I'm hoping the belt will cover that front triangle that is mismatched. Again,
I have some things I need to clean up, but I think I'm ready for the next
step. I'm hoping the belt will cover that front triangle that is mismatched.
Now the belt was a real problem. Nothing fit! every belt I loaded looked
stupid!
Back to the template! Let's paint in a little Yellow! |
|
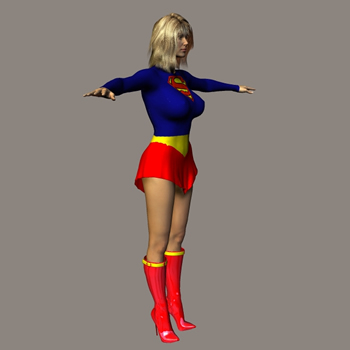 OK..
not bad. I put a strip of yellow across the midsection. The V3 skirt that
droops finally paid off, since it's simulating the downward yellow triangle
up front. It's not a "belt" but it will work for out purposes. OK..
not bad. I put a strip of yellow across the midsection. The V3 skirt that
droops finally paid off, since it's simulating the downward yellow triangle
up front. It's not a "belt" but it will work for out purposes.
I also increased her breast size. I was able to do this right on the
Catsuit without having to load the breast8 morph. I also added breast
smooth for that leotard look.
Then I went back to the material, and I added 2 red stripes on the belt.
Now for a cape! |
|
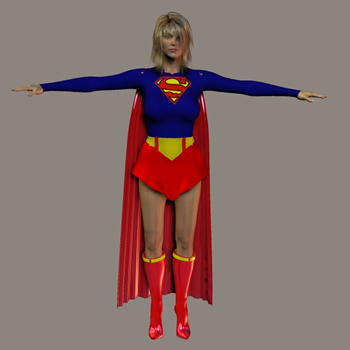 Whelp.
Now the cape looks great! Only it left 2 nubs on my girl's shoulders.
Back to the materials room to either make it transparent, or color it
blue! Whelp.
Now the cape looks great! Only it left 2 nubs on my girl's shoulders.
Back to the materials room to either make it transparent, or color it
blue!
I'm back from the materials room. I just made the "straps"
transparent. |
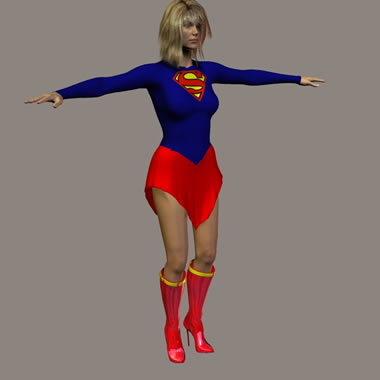
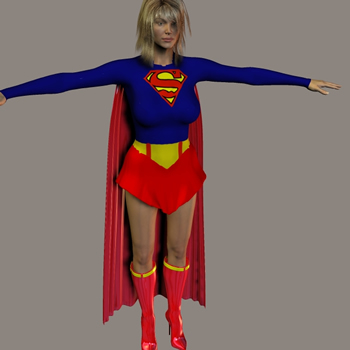 So
here is what we got. Looks OK.. Let's pose her! So
here is what we got. Looks OK.. Let's pose her! |
|
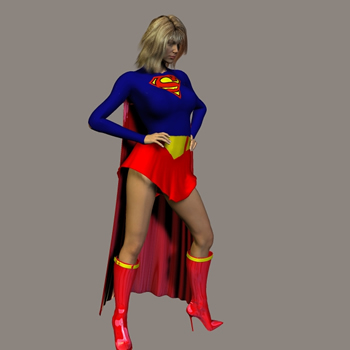 Not
too Shabby.. but I think she might need panties.. Not
too Shabby.. but I think she might need panties..
NAAAA! :) |
|
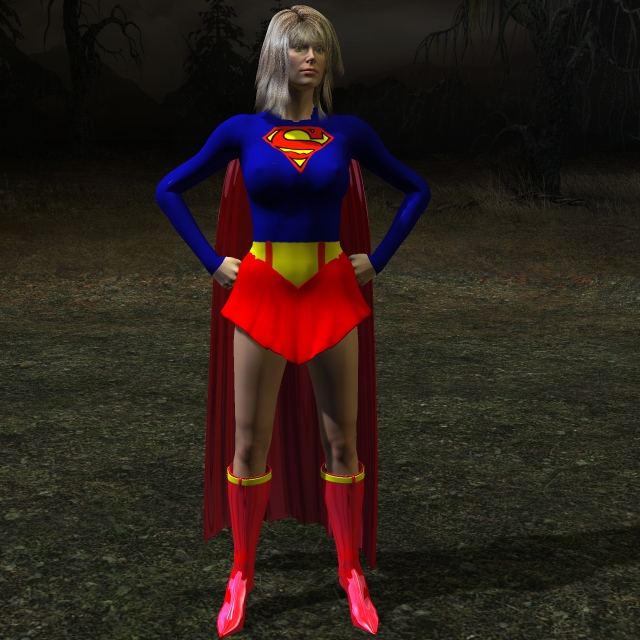 So
here is the final render. Raw. So
here is the final render. Raw.
What I would then do is take that image into Photoshop and clean it up.
Smooth out the neck and skirt.
I hope this tutorial helped you!
Jpeger. |
